Automating Asset Acquisition
Approximate read time: 7 minutes.
Background
ResourceCalculator.com is a video game tool that lets you answer the question “What are all the materials I need to gather to build my next project”. It takes all the data about each specific item and creates a flow of raw materials to desired items. However, for the Resource Calculator to do this, it needs to get the data on each item from somewhere. Typically, that has been a tedious manual process. This post breaks down one method used for automating this work inside the video game Minecraft.
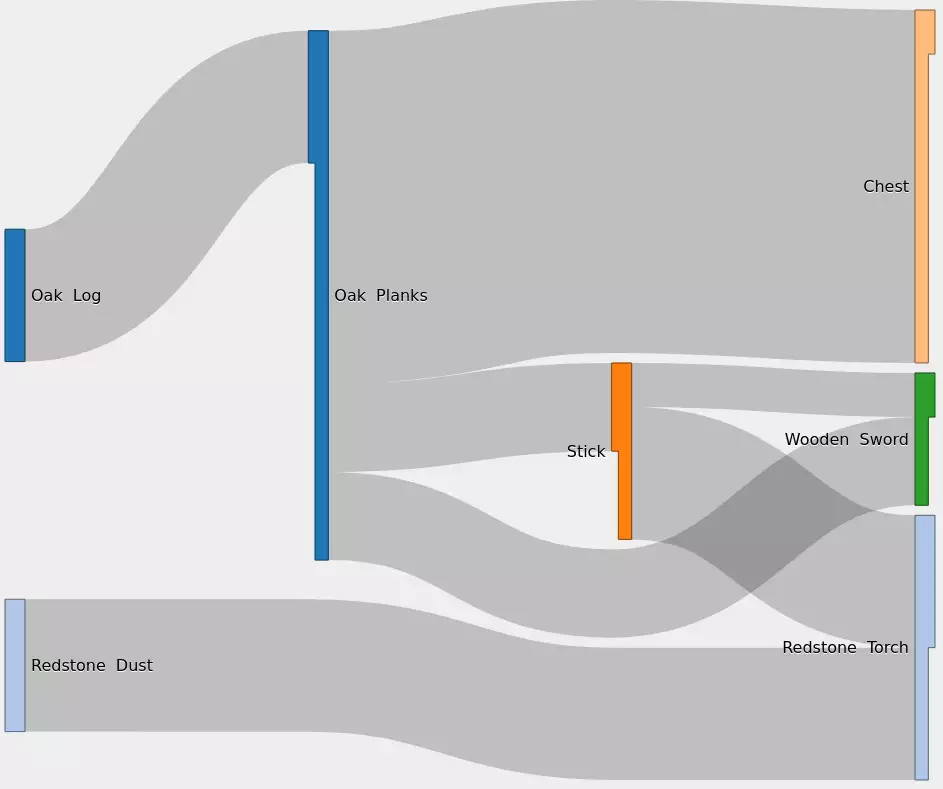
Minecraft recently released its 1.17 update. For ResourceCalculator.com to continue to function properly, the data and icons need to be updated too. Otherwise, it may return the wrong results to the users, and a calculator that gives you the wrong number is about as useful as an unsharpened pencil with no eraser. Minecraft has just around a thousand items at this point and for Resource Calculator to work correctly it needs data about each one. This data primarily falls into 4 groups.
-
The name of the item.
-
A picture of the item.
-
A list of all the methods of creating the item.
-
Optional flags (a.k.a. custom settings)
The first two are pretty self-explanatory, and what we will cover in this post. The latter two are quite complex to automate therefore, as every good programmer knows, we will go for the easier stuff first.
Before we begin, some fun trivia to start with. In this version of the game, there are no items at all that use the lowercase letter j or the uppercase letter X. Every other uppercase and lowercase letter of the English alphabet is used.
Getting Item Images
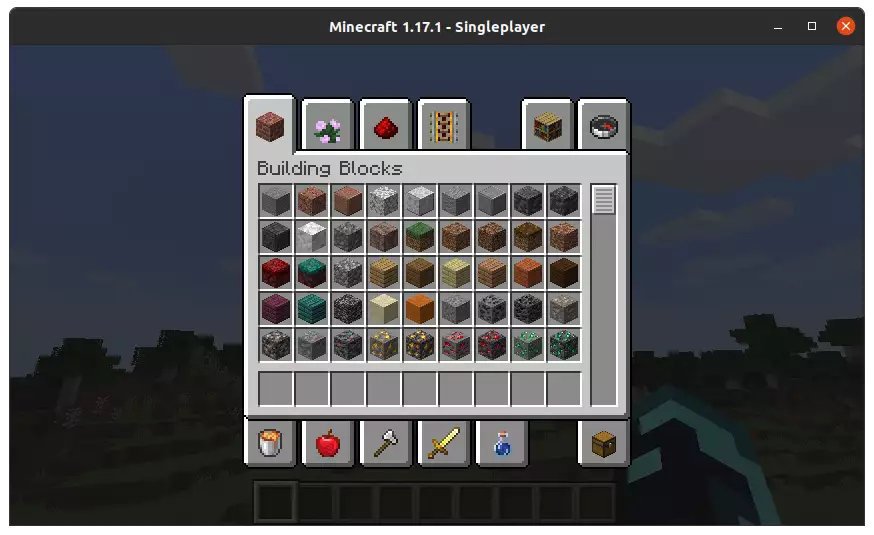
Now that we have a limited scope, let’s see what we can do. One option is that we can scrape these images from the wiki. However, that is an extra level of human interaction where something can get mangled. We know we already have the images available to us on our computer because we can see them in-game, let’s try to grab them from there instead. Luckily Linux offers some good options for programmatically moving the mouse and capturing the screen. For taking screenshots we will use the ImageMagick subprogram import. Import allows us to take screenshots of the entire desktop, but it also lets us take screenshots of specific rectangles on the desktop as long as we specify the position and size.
import -window root -crop "32x32+782+459" cropped_screenshot.webp
Luckily Minecraft has a grid layout in their creative menu, so we can easily calculate all the positions and sizes of each item in the menu so long as we know the top left corner of the menu.
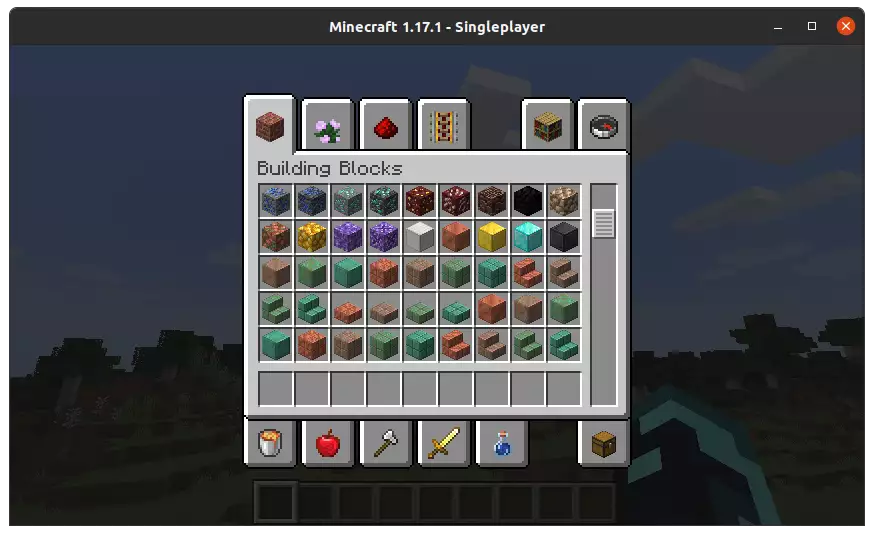
But Minecraft has way more items than can fit in their 5x9 creative menu. Minecraft uses a scroll bar to allow players to navigate to the next page of the menu. All we need to do is scroll down. We could do this by clicking and dragging the scroll bar, but it is much easier to just use the scroll wheel! We can specify the number of clicks of the scroll wheel we want, which will allow us to scroll precisely to the next page.
Once again Linux has a wonderful little tool to handle this. xdotool is just a tool to tell X11 to do things. I love it when names make sense.
xdotool click --repeat 5 --delay 200 5
Here we told xdotool to click mouse button 5, the scroll wheel down button, five times with a 200ms delay between each click. That delay is there so that Minecraft has time to catch up to each input by the time the next input is sent. Each scroll wheel down click moves the menu one row, there are five rows, so five clicks should bring us exactly to the next page.
Wonderful! But what do we do about the final page, where we hit the bottom and can’t keep scrolling? Well, we do nothing right now because Mojang has been so kind as to release this version with exactly the right amount of items to display a full page at the end, so there is no overflow! This will almost definitely be a problem that will need to be dealt with for future versions of Minecraft and like a good programmer we will deal with it when those future versions come out.
Now we have an image of every item in the game, but there is still a slight problem. We have no idea what that item is! If we don’t know what item we have a picture of, then we can’t assign it to the right place on the calculator page.
Getting Item Names
Players can see the names of items in the game by moving their mouse over the items and getting a handy little pop-up with the name of the item and some other text. This is great for humans who can read images but computers want something more ASCII.
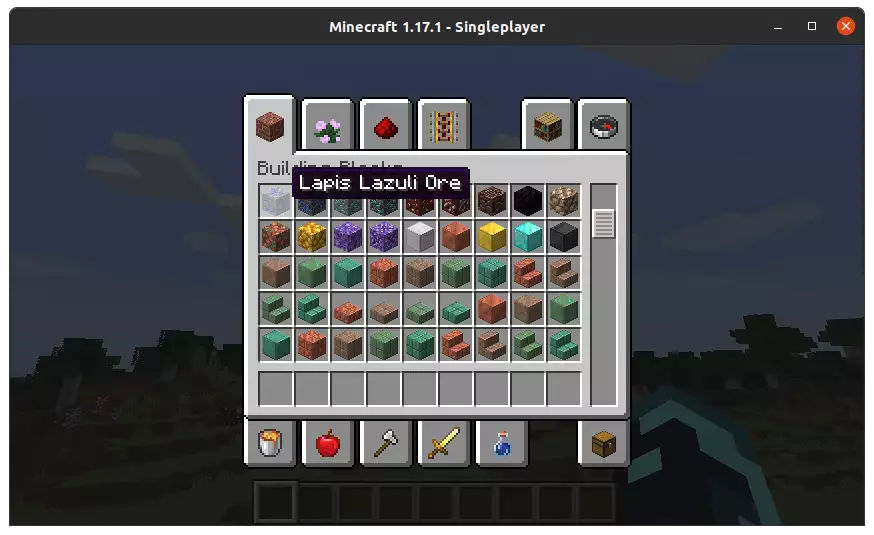
Our only saving grace here is that the top left corner of the hover menu appears in exactly the same position relative to the mouse each time. This means as long as we know where the mouse is we can calculate the top left corner of where the text will be.
Well great! We need to move the mouse over the icon to begin with so let’s just move it to a fixed spot of “right in the middle of the item”.
xdotool mousemove 798 475
Now that we know where the mouse is, we can calculate where the top left corner of the name of the item will be. However, we cannot know where the item’s name will end because we don’t know how long the word is. In order to compensate we will just take a screenshot that starts at the top left corner, and extends all the way to the end of the screen.
import -window root -crop 1098x16+822+451 image_text/0.webp
Great, we have a screenshot of the name, but we still need to convert that into text. My first attempt of decoding this image was via the OCR tool Tesseract. Unfortunately, it turns out that Tesseract does not like these small images that use pixel fonts. The next option was grabbing each individual pixel and deciding what letter it corresponded to. The letters are mostly light pixels and the backgrounds are mostly dark pixels. If we increase contrast, then we can turn all the light pixels into white pixels, and all the dark pixels into black pixels. To do this quickly, we can use another of ImageMagick’s tools convert.
convert image_text/0.webp -grayscale Rec709Luma -brightness-contrast 50x100% image_text/0.webp
Running that command gives us a solidly black or white image that looks like this:

Then we look for any columns that contain only black pixels, and use that to divide up the image.

After the image is divided, we eliminate any chunks that are over 10 pixels wide.

After that we convert each column of pixels to a single byte, white pixels become 1s black pixels become 0s. For this item, we would get the follow hex values.
| Index | Hex | Letter |
|---|---|---|
| 0 | 0x44a2a2a29c |
S |
| 1 | 0x20fc22 |
t |
| 2 | 0x1c2222221c |
o |
| 3 | 0x3e2020201e |
n |
| 4 | 0x1c2a2a2a1a |
e |
Using a lookup table we can take those binary chunks and do a quick check to see what letter they correspond to. Once we do that, we have an ASCII string!
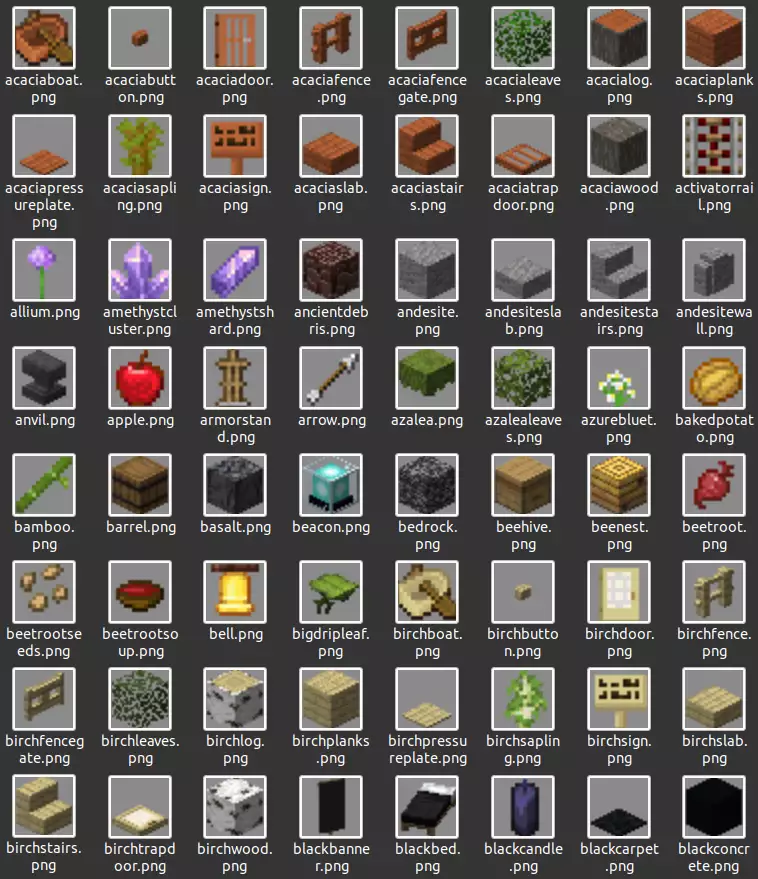
Result
Success! We now have a series of named images that were obtained directly from the source, no wiki scraping or manual work.
If you got to here, you may be interested in looking at the complete source code from this post. Here are direct links to the bash screenshot tool script and the Minecraft pixel font OCR script.
Check out Resource Calculator at ResourceCalculator.com to see the final result of this work.